How to update your profile
You can manage the content of your company profile page in eMessukeskus, which serves as the exhibitor service platform. Log in and complete your profile – this will help ensure maximum visibility for your trade fair participation!


Why completing your company profile matters
Your company profile on the event website is your opportunity to tell visitors why your stand is worth visiting.
Your profile should highlight what you will offer at the exhibition, such as:
- new products or services you will be showcasing.
- which experts visitors can meet at your stand and when.
- what kind of program or demos you will provide.
- whether you will be giving a keynote presentation.
By sharing this information in advance, you help visitors decide to attend the exhibition – and to visit your stand specifically.
Your profile information is shared across multiple event systems
Our events feature a new AI-powered exhibition guide that pulls its information directly from company profiles in eMessukeskus. The more complete your profile is, the better the guide can showcase your company and guide visitors to your stand.
Your company profile information is also transferred directly to the EventsPRO app, which is used by professionals during the event.
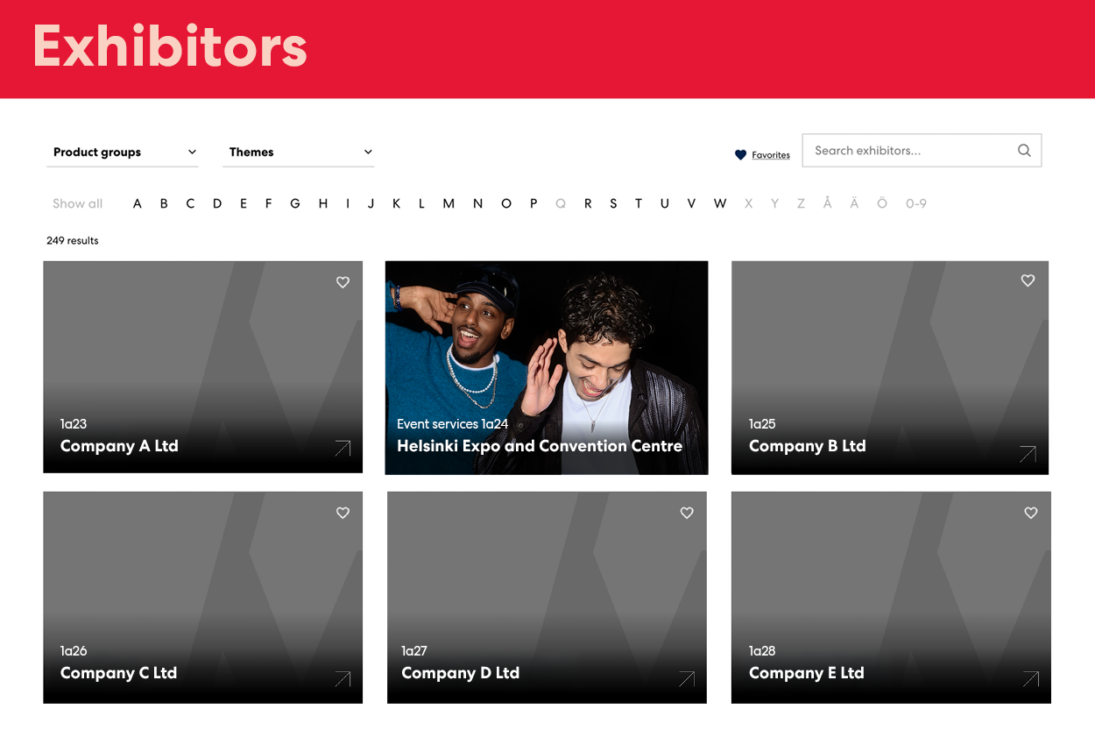
Above, you can see an example of how a company appears on the event website when the profile page has been completed – and how it looks when the profile has been left incomplete. A completed company profile attracts attention and encourages visitors to learn more about your company.
See an example of a completed company profile page
Logging in
Log in to the company profile management through eMessukeskus, the Exhibitor Service Online. More information about the accounts and log in process to eMessukeskus can be found from Info-page.
How do I navigate to company profile management?
- Log In to eMessukeskus and select the event you want to edit.
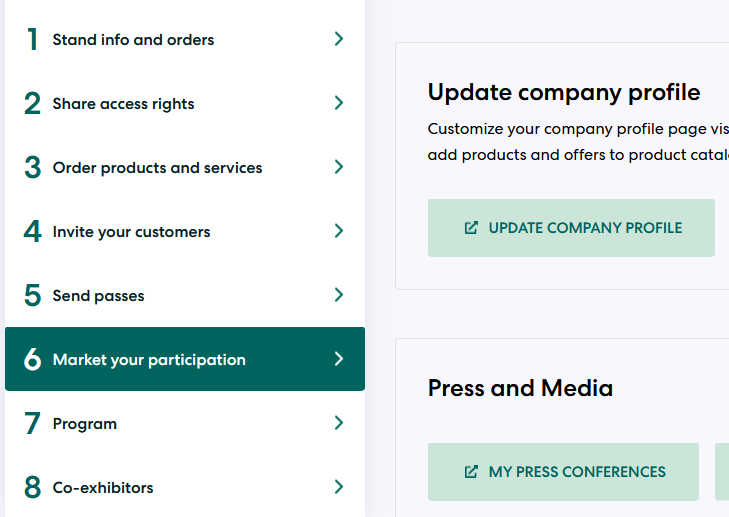
- Select the “Market your participation” tab and select “Update company profile”.
Your profile page is visible on the event site after the profile page is saved for the first time.
Menu items and basic navigation
Main menu is located on the left side of the window. Menu has following sections:
- Profile pages where you can manage and edit your profile page content
- Catalog items where you can manage and add catalog items
- Stand programme where you can manage and add the programme happening at your stand.
- Press releases for adding new press releases
- Press conferences for adding new press conferences.
Changing the UI language it has no effect on the content displayed on the event site to the users.

Profile pages
Profile page consist of five sections.
- HERO ELEMENT: On the top of the page, general information is shown as a Hero element. You can edit some of this information in the basic information section
- PRODUCT GROUPS AND THEMES: You can choose relevant product groups and themes for your profile page and products.
- FREE CONTENT: Free form content can be added after the Hero element. You can add as many elements as you like and change the order.
- OFFERS: All the offers you add to the catalog are shown on profile page. The catalog is also a separate page on the site that contains all catalog items from all exhibitors.
- PROGRAMME: The stand programme will be displayed on the event’s programme page. The programme is not visible at all events.

How to edit profile page
General information
- NAME THE PAGE: Give a name to your profile at the top of the page. The name is visible in the service and acts as a search parameter.
- ADD GENERAL INFORMATION: Add general information such as description, contact person info and image.
- SELECT CATEGORY:Select a profile category on the right side menu. Categories are shown on the company list page.
- CHOOSE PRODUCT GROUPS: Choosing product categories will improve the discoverability of your business. They are also used to target content based on visitor interests.
- FILL IN THE LANGUAGE-SPECIFIC FIELDS. These fields will only appear in the specific language of the site.
Add content to profile
You can add the following content types using the free content editor:
TEXT & PHOTOS: Enter text and upload images. Images are shown 976px wide on the page. Amount of text is not limited. You can format text e.g. paragraph styles, text styles and lists.
LINKS: You can add a link from link button. You can add links to external sites and to documents.
Save changes and publish pages
When you want to save the changes added to the page select “Update” on the upper menu. Remember to save changes every time you update content!
The page is published automatically. If you want to remove the page from the event site change the status of the page to Draft. When you want to publish the page again change the status to Published.
You can preview your page by selecting “View profile page” from the sidebar navigation up top.
Catalog
- Add the name to your item at the top of the page. The language versions are mandatory.
- Fill the form details:
- Description
- Price and Original Price *
- Valid from and to dates
- URL where you want to direct the users
- Image
* If your item does not have a price, you can leave price and original price fields empty
** If price and original price are equal leave original price empty
*** If you enter Price and Original Price, discount percentage is displayed automatically on the event site.

How to publish catalog items
Publish the item with “Publish” button on top menu
Stand programme
- Enter name name and description of the stand programme. It is also possible to add language versions.
- Next, fill in the common information:
- The time and date of the stand programme
- Image for the programme
The stand programme is located at the bottom of the programme calendar.
Press releases and press conferences
- Enter the name and the description of the press release or press conference.
- Next, fill in the common information:
- An image for the press release or press conference
- Optionally attachments
- In addition, press conferences require a set date and optionally, you can also add a location.
Julkaisun jälkeen lehdistötiedotteet ja -tilaisuudet näkyvät Messukeskuksen uutishuoneessa.
After they have been released, the press releases and press conferences are visible in the Messukeskus Newsroom.

Tips
This is how you make your profile site stand out!
Set your goals
As an Exhibitor, you want to stand out from the crowd and to be remembered by the visitors. Then you should think about what you want the visitor to do straight after they have visited your profile page. Do you want to direct them to an article, a useful guide or to your webshop?
Clarify topicality and customer benefits
For you to succeed online, you need to combine the elements of traditional event marketing and content marketing. The content needs to be relevant, benefit the visitor and targeted. So don’t just be content with uploading your logo and generic business presentation. Engage your visitors with interesting offers and interactive content. Tip! You can update your profile page and catalog item whenever you want!
Get inspired to complete your profile page
Tell visitors about your new products, the experts appearing at your stand, your program, and why visitors should stop by your stand specifically!
See an example of a completed company profile page